Creating Simple HP Bars


In this tutorial I will show you how to write some HP Bars from scratch. By scratch, I mean with the default project of course, but the principles should apply in general. We will make some very simple bars with the following properties:
- It is a rectangle
- The size of the bar reflects how much HP they have left as a percentage
- The color of the bar changes when HP goes below 50%, and then changes again when it goes below 25%
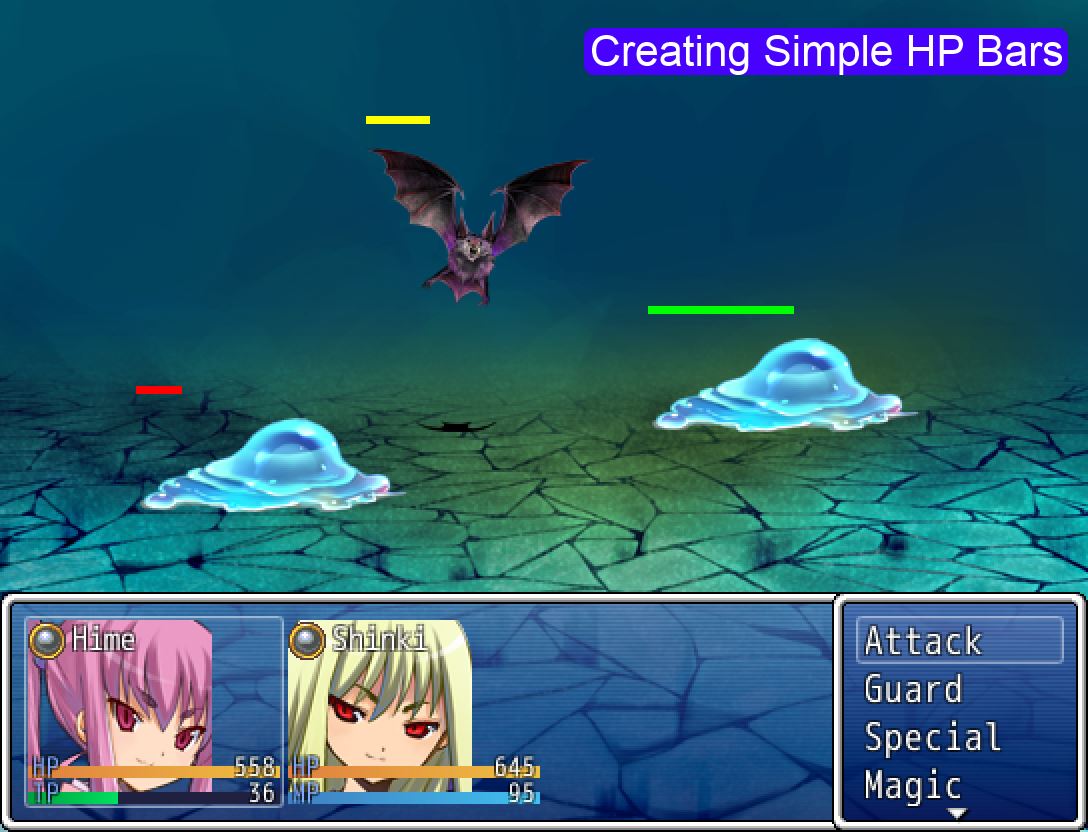
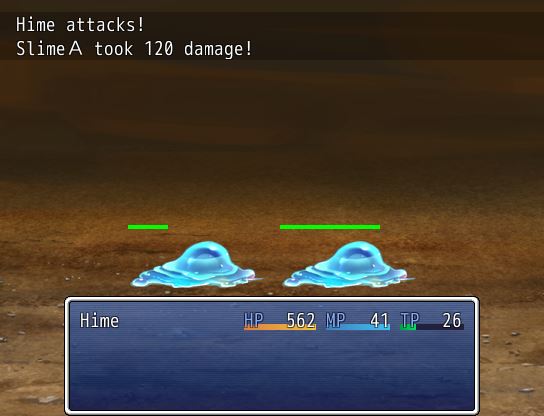
At the end of this tutorial, you’ll have something that looks like this (focus on the HP Bars):
Setting up some Constants
Before we start working with our HP bar, we should start by determining what we want.
We know that we will be working with a rectangular bar, so we’ll need to determine the width and height of the bar. Should the size be fixed? Should it change depending on how much max HP the battler has? Let’s just assume it will be fixed for now:
- Width = 100 px
- Height = 4 px
Next, we’ll need to come up with some colors. How about:
- Green for healthy = RGB (0, 255, 0)
- Yellow for somewhat injured = RGB (255, 255, 0)
- Red for critically injured = RGB (255, 0, 0)
Let’s create our script. Open the script editor and start a new script under Materials.
We start by writing our configuration section so if we want to adjust them we know where to go:
module HP_Bars
  Width = 100
  Height = 4
  Healthy_Color = Color.new(0, 255, 0)
  Injured_Color = Color.new(255, 255, 0)
  Critical_Color = Color.new(255, 0, 0)
end
Creating a test bar
Before we worry about how to make our HP bar work, we need to figure out how to actually draw a bar in the first place. How do you add an HP bar to the screen during battle?
Since the HP bar is associated with a battler, it would make sense to have Sprite_Battler objects hold them. So let’s go in and add a simple bar. Just add this to the script you’re working on:
class Sprite_Battler < Sprite_Base

  alias :th_battler_hp_bar_initialize :initialize
  def initialize(viewport, battler = nil)
    th_battler_hp_bar_initialize(viewport, battler)
    init_hp_bar if battler
  end

  def init_hp_bar
    @hp_bar = Sprite.new
    @hp_bar.bitmap = Bitmap.new(HP_Bars::Width, HP_Bars::Height)
    @hp_bar.bitmap.fill_rect(0, 0, HP_Bars::Width, HP_Bars::Height, HP_Bars::Healthy_Color)
  end

  alias :th_battler_hp_bar_dispose :dispose
  def dispose
    @hp_bar.dispose if @hp_bar
    th_battler_hp_bar_dispose
  end
end
We start by creating a sprite, and then we create a bitmap for the sprite with the width and height that we have decided on. We then fill the bar with our healthy color.
Now, not all battlers actually have a battler object. If you are using the default project, you will see that actors do not have a battler sprite associated with them, so it wouldn’t make much sense to create an HP bar for them.
At the bottom, we also include logic for disposing the sprite. It is good practice to dispose sprites or your game might crash randomly.
Here are the results:
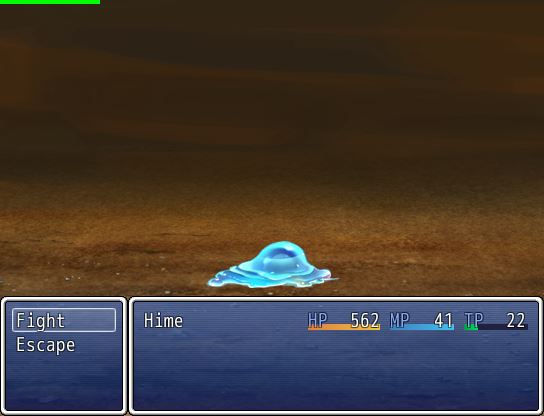
There is a green bar in the top-left corner of the screen! So we know how to draw a bar.
Re-positioning the HP Bar
Our HP Bar shows up, but it doesn’t show up in the right spot. This is because our code does not have anything about positioning the bar. It would be more useful if the bar was located somewhere close to the battler that it’s associated with, so let’s look at how the battler sprite itself is determined.
In Sprite_Battler, you will see this method
def update_position
  self.x = @battler.screen_x
  self.y = @battler.screen_y
  self.z = @battler.screen_z
end
We will do something similar with the HP Bar. Add the following code to your script:
alias :th_battler_hp_bar_update_position :update_position
def update_position
  th_battler_hp_bar_update_position
  update_hp_position if @hp_bar
end

def update_hp_position
  @hp_bar.x = @battler.screen_x
  @hp_bar.y = @battler.screen_y
  @hp_bar.z = @battler.screen_z
end
Now the HP bar’s position will be updated whenever the battler’s position is updated, which is also nice because if the battler moves around, so will the HP bar. We now have this:
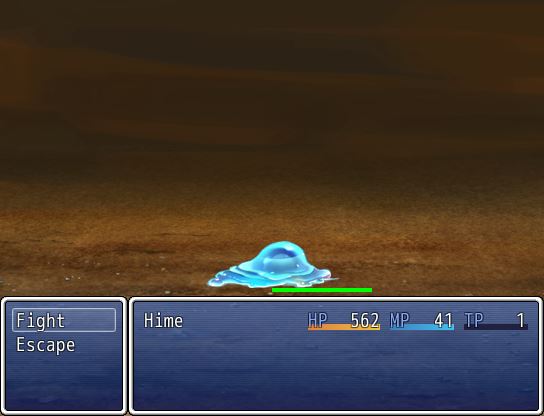
Which seems a bit strange: our bar’s position is based on the battler object’s position just like the battler sprite, but why does our bar appear at the bottom of the sprite, and in the center of the image?
I will let you figure out the mystery yourself since it’s not completely related to this tutorial. Here’s a hint: origin.
In any case, let’s re-position the bar by rewriting our position method as follows:
def update_hp_position
  if bitmap
    @hp_bar.x = @battler.screen_x - bitmap.width / 2
    @hp_bar.y = @battler.screen_y - bitmap.height - 16
    @hp_bar.z = @battler.screen_z
  end
end
Adding a second slime to verify that the HP bars are positioned with the correct slime, we get this:
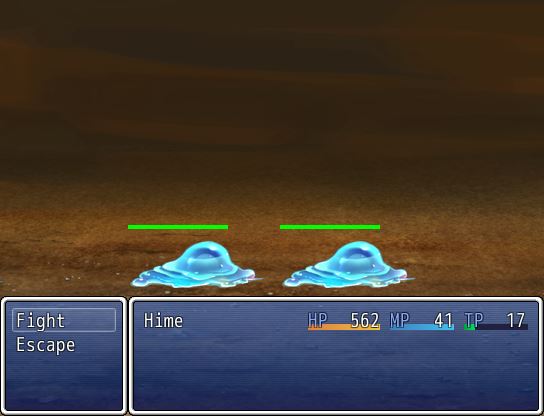
The position still seems a bit strange, but it will do.
Updating Bar Width
At the moment, we have hardcoded our HP bars. We have a bitmap canvas that is 100 px by 4 px, and we filled it up entirely with a green rectangle that is 100 px by 4 px. This is good as a prototype, but we’ll need to modify this as our HP values change.
Because the HP can change at anytime, we would like to check this every frame. We will use the update method:
alias :th_battler_hp_bar_update :update
def update
  th_battler_hp_bar_update
  update_hp_bar if @hp_bar
end

def update_hp_bar
  @hp_bar.bitmap.clear
  width = HP_Bars::Width * @battler.hp_rate
  height = HP_Bars::Height
  bar_color = HP_Bars::Healthy_Color
  @hp_bar.bitmap.fill_rect(0, 0, width, height, bar_color)
end
We start by clearing the bitmap canvas (otherwise old colors will still be there). For the width, we want to reflect the current HP as a percentage of the max HP, so we use the `hp_rate` method and multiply it by our HP bar’s max width. Our height will still be the height of the bar, and our color will still be the healthy green color.
To test that it works, we attack one of our slime:
Slime have 200 HP. If SlimeA took 120 damage, then it has 80 HP left. The bar should be about 40% of the maximum size.
Adding some Changing Bar Colors
Our slime has just taken 120 damage, leaving only 80 HP out of a total of 200. This puts it at 40% HP. We would like to reflect this by changing the color from our healthy green color to a somewhat injured yellow color.
Let’s move the bar color into its own method, like this:
def update_hp_bar
  @hp_bar.bitmap.clear
  width = HP_Bars::Width * @battler.hp_rate
  height = HP_Bars::Height
  @hp_bar.bitmap.fill_rect(0, 0, width, height, bar_color)
end

def bar_color
  if @battler.hp_rate < 0.5
    HP_Bars::Injured_Color
  else
    HP_Bars::Healthy_Color
  end
end
Things look a little more organized now. Imagine having all that code inside a single method.
We can see that when the HP is less than 50%, we will use the injured color. Otherwise, it will use the healthy color.
Results?
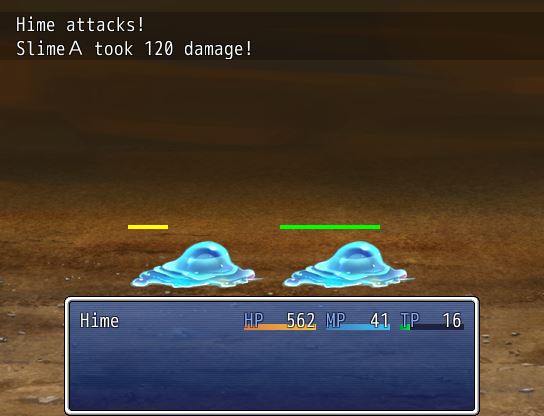
Now we have some simple HP bars!
A Little Optimization
At the moment, our logic basically says to update our HP bar every frame. This means that on every frame, the game will clear out the HP bar and re-draw it, even if it didn’t change.
This can be quite wasteful: why re-draw the bar when it hasn’t changed? It isn’t going to look any different the next time around. And drawing itself isn’t free either. Add a little print statement to your `update_hp_bar` method and you’ll see that it is run every frame:
def update_hp_bar
  p 'update'
  @hp_bar.bitmap.clear
  width = HP_Bars::Width * @battler.hp_rate
  height = HP_Bars::Height
  @hp_bar.bitmap.fill_rect(0, 0, width, height, bar_color)
end
What we want to do is to update the bars ONLY if the value has changed. But how do we do this?
An easy way is to simply save the HP value in a variable.
def init_hp_bar
  @last_hp = 0   ###
  @hp_bar = Sprite.new
  @hp_bar.bitmap = Bitmap.new(HP_Bars::Width, HP_Bars::Height)
  @hp_bar.bitmap.fill_rect(0, 0, HP_Bars::Width, HP_Bars::Height, HP_Bars::Healthy_Color)
end

def update_hp_bar
  return if @last_hp == @battler.hp  ###
  @last_hp = @battler.hp             ###
  p 'update'
  @hp_bar.bitmap.clear
  width = HP_Bars::Width * @battler.hp_rate
  height = HP_Bars::Height
  @hp_bar.bitmap.fill_rect(0, 0, width, height, bar_color)
end
At the top, we initialize a variable that we’ll use to cache the most recent HP value we have seen. Then, when we are updating our HP bar, we first check if it has changed. If the last HP is equal to the battler’s current HP, then it hasn’t changed, and we’ll return.
Otherwise, we update the last value we’ve seen and proceed to update the bar.
With this technique, we have effectively prevented unnecessary updates, but we will always update if the HP has changed.
What’s next?
At this point, we have a very simple implementation of HP bars. It is also rather messy, but it works for a first script I guess. We can probably refactor our code by moving the HP bar sprite into its own class and then continue building it from there.
Some additional features that you can add include
- Animations when the bar changes size
- Drawing a second “container” rectangle to remind players what the max width is
- Customizing the width of the bar based on the associated battler. Maybe boss battlers should have longer HP bars.
- Creating multiple health bars for a single battler, rather than one large health bar.
Spread the Word
If you liked the post and feel that others could benefit from it, consider tweeting it or sharing it on whichever social media channels that you use. You can also follow @HimeWorks on Twitter or like my Facebook page to get the latest updates or suggest topics that you would like to read about. I also create videos showcasing various RPG Maker techniques on my Youtube channel.

![[Tutorial Series] Hime ATB #1: Designing a Simple Active Battle System](https://himeworks.com/blog/wp-content/themes/hueman/assets/front/img/thumb-medium-empty.png)


I have no f***ing idea how to do this but is this right –
http://pastebin.com/vfMVCEHA
Please avoid posting scripts directly in the comments. You should use something like pastebin or gist and then post a link to it.
After the “dispose” method, you have an extra “end” which closes the class. This causes problems for the rest of the methods. You should move that extra end to the bottom.
It’s not working! Your script to adjust it always messes up saying a nameerror occurred.
This is wonderful. I followed this guide and it worked. I know you are working on other projects right now but my question is how do you make the bar slide down frame by frame and not disappear instantly. From what I gathered online I saw things like using .min and .max methods but I’m very new to Ruby and I can’t figure out this minor detail.
Animation can be pretty complex. First, it would be good to understand what the update_hp_bar method is doing: it’s basically checking the value of the battler’s HP and then redrawing the bar as needed.
Now, if you think about it, this is done immediately. So the question is, how do you make it decrease as a certain “rate” over time? That is, how much do you increase/decrease per frame?
Let’s say you lost 60 HP, and you wanted the bar to decrease in 60 frames. This means that each frame, you would lose 1 HP.
You would need to introduce a few more extra variables that store the “target” width, as well as the “duration” for this animation to occur over.
You would then need to separate the “check battler HP” from “update HP bar” logic, since those are now two separate things. The battler’s HP might change once, but then the HP bar might change many times.
Thanks, that actually brought up a lot of insight to this whole situation. I might be out of my league when I started this, but this has been a good tip.
I give up! I can’t do animations! Problems include but are not limited to understanding the secret of updating the width of the bitmap until it has reached it’s target. I can’t even update the width per frame. I have a good feeling that the until method is not going to cut it. I can’t even pull off the basic step of having it slide down.
Instead I put a percentage right under the HP bar! It’s cute and does whatever I tell it to do! Drawing text is so much easier. I’m so sorry I suck.
Hmm, I would recommend taking a look at Game_Picture class to see how it moves pictures around. This might give you some ideas how the animation process works. That’s how I learned it anyways.