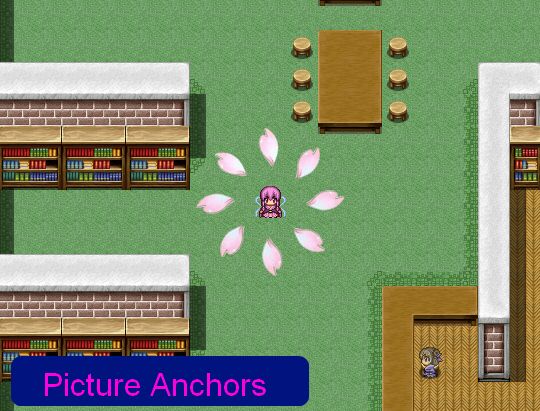
Picture Anchors


This script introduces the concept of “picture anchors”. An anchor is a tool that fixes an object to a certain position. A picture anchor functions the same way: it fixes the picture to a certain position.
By default, pictures are anchored to the screen. This is why no matter where you move, the picture always follows you.
This script allows you to change the picture’s anchor. You can anchor a picture to a character on the map so that the picture follows that character instead of the screen.
You can also anchor the picture to a position on the map, so that the picture will never move from that position as long as it is anchored there. By anchoring a picture to the map, you can use these pictures for additional visual effects that you normally could not obtain using the tile editor.
In order to achieve multi-layered maps using overlay mapping, having absolute control over where your pictures are positioned is essential.
Download
Script: download here
Tutorials
Installation
In the script editor, place this below Materials and above Main.
Usage
Picture IDs
Every picture has an ID. When you use the “Show Picture” command, you specify the ID of the picture that you want to use. You would then use this ID whenever you want to refer to that picture.
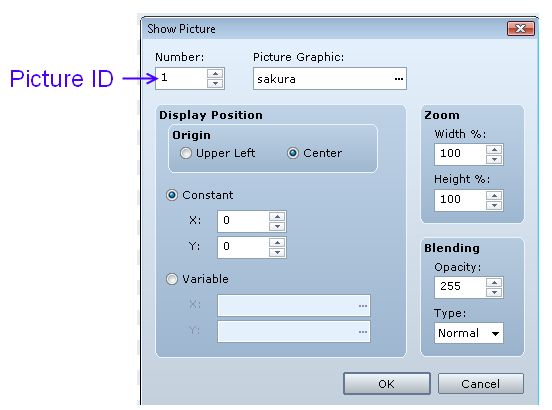
Picture anchors work the same way: you must specify which picture the anchor will be applied to.
Assigning Anchors
Script calls are used to set anchors. There are different types of anchors. Every script call requires you to specify the picture ID you will be working with.
Screen Anchor
This is the default anchor. Pictures that are anchored to the screen will
follow the screen. To anchor a picture to the screen, use the script call
anchor_picture_to_screen(id)
Map Anchor
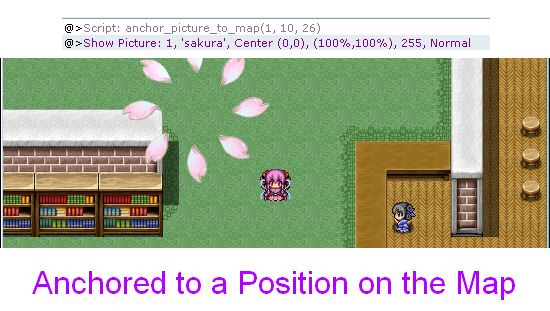
If you would like to anchor a picture to a specific position on the map, use a map anchor. Use the script call
anchor_picture_to_map(id, x, y)
Note that the position is specified in tile coordinates, not pixel coordinates.
Player Anchor
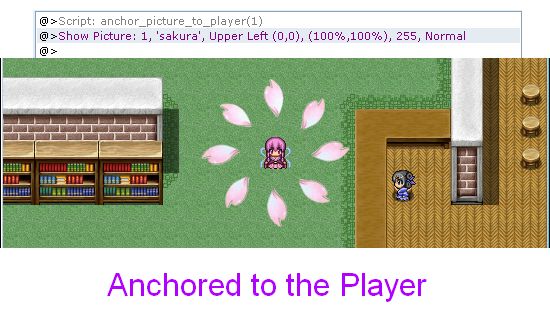
If you would like to anchor a picture to the player, use this anchor. Use the script call
anchor_picture_to_player(id)
Event Anchor
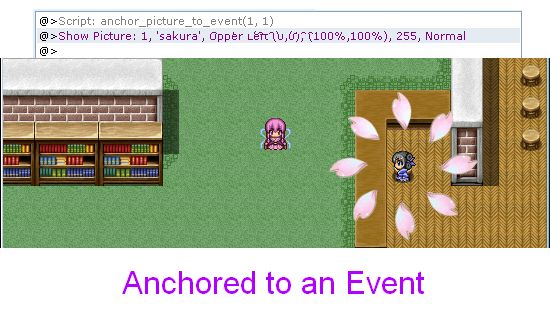
If you would like to anchor a picture to an event, use this anchor. Use the script call
anchor_picture_to_event(id, event_id)
Follower Anchor
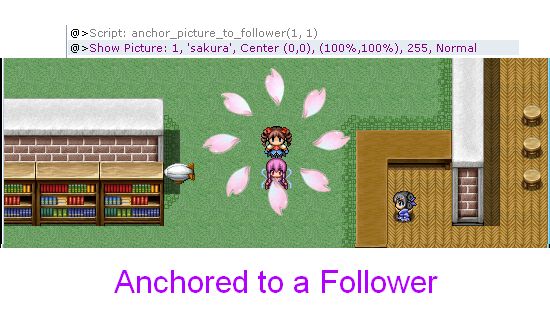
You can anchor pictures to party followers. The first follower is the actor right behind the leader. Use the script call
anchor_picture_to_follower(id, follower_num)
Vehicle Anchor
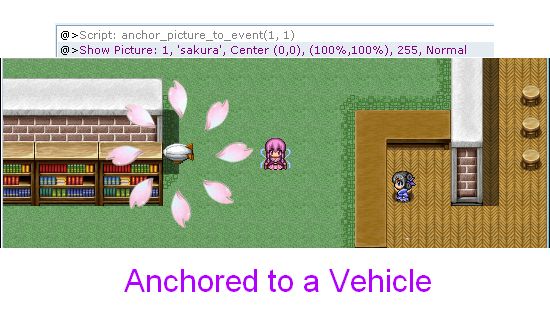
You can anchor a picture to a vehicle. For vehicles, these are the vehicles types:
:ship
:boat
:airship
Use the script call
anchor_picture_to_vehicle(id, vehicle_type)
Picture Properties
There are two properties that are related to a picture’s position, and those are its [x, y] offset as well as its origin.
The offset is relative to the anchor. For example, if you anchor the picture to tile (10, 10) and your picture has an offset of 50 pixels to the right, then the picture will be drawn 50 pixels right of position (10, 10) on the map.
The origin behaves the same as before. If the origin is at the center of the image, then the image will be centered at the anchor.
Animated Pictures
RPG Maker supports some picture animations by default. They are provided as the following event commands:
- Move Picture
- Rotate Picture
- Erase Picture
Moving a picture does more than just moving a picture. In addition to moving a picture, you can change the opacity over-time, or change the width or height, or change the blend type. This allows you to accomplish a few types of animations quite easily.
Picture Layers
Pictures are layered. The editor allows you to display 99 pictures. This means that you have 99 layers to work with. The higher the picture ID, the higher it is drawn. This means that picture 1 is drawn under picture 2, which is drawn under picture3, which are all drawn under picture 4.
You can take advantage of this to organize your map in such a way that you can hide or show certain layers as necessary.


how i change the z value by script call?
I wish something like this existed for MV….