Tutorial: Creating your own Collision Maps


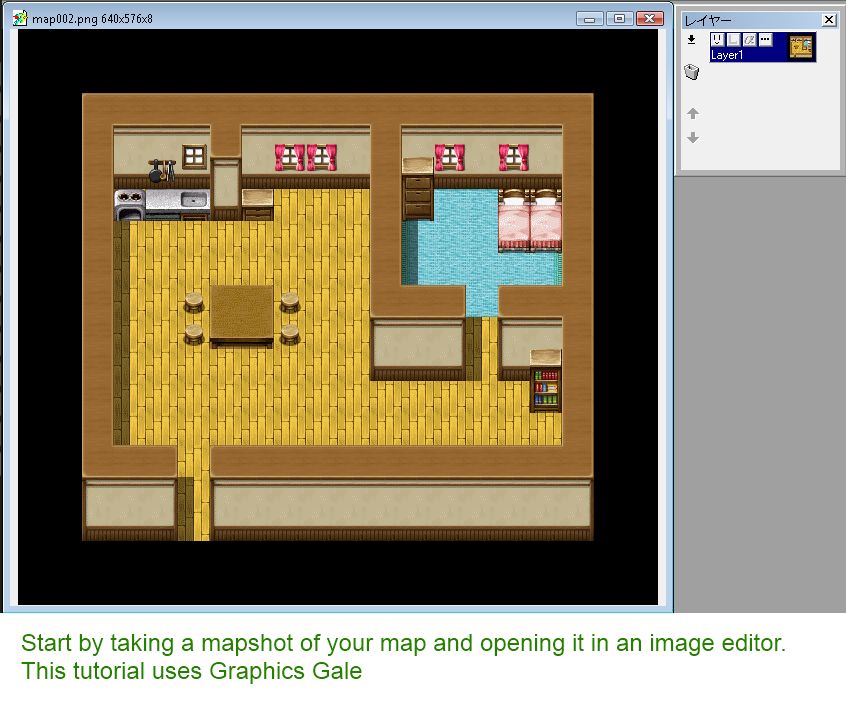
This tutorial demonstrates how to create a collision map. The approach used is to take an image of your map and then draw the collision map on top of the image, using the image as reference, and then saving the collision map.
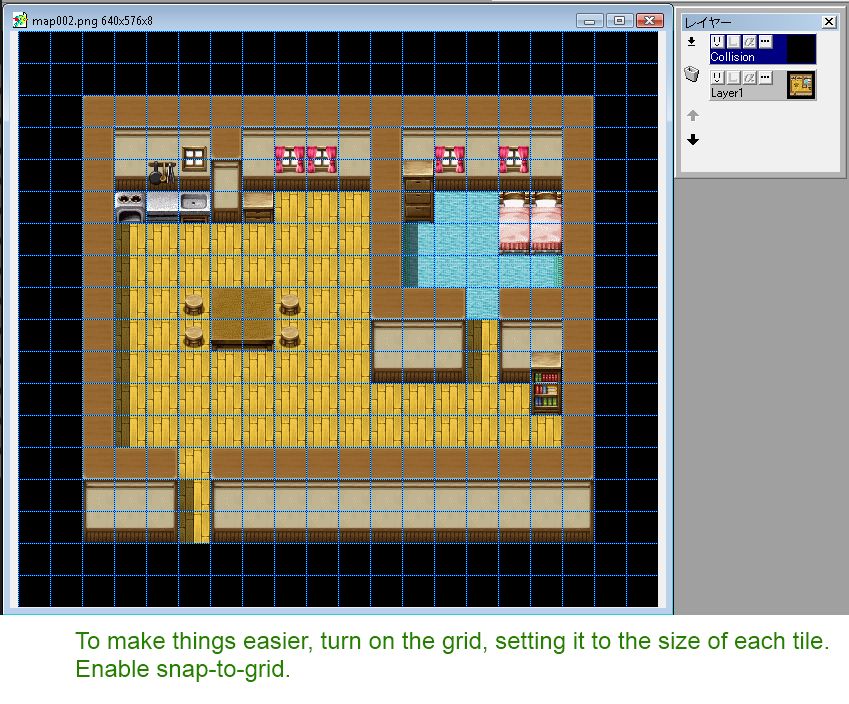
This example assumes the tile size is 32×32, but you can use it for any tile size. You should use an image editor that provides a grid along with snap-to-grid functionality. The editor I used is Graphics Gale, which you can download for free from the company’s website.
Required
- Image Editor (paint.NET, Graphics Gale, GIMP, Photoshop, etc.).
The free version of Graphics Gale can be obtained here - A script that allows you to use collision maps, such as Collision Maps
- A way to get an image of your map, such as using Map Screenshot
Instructions
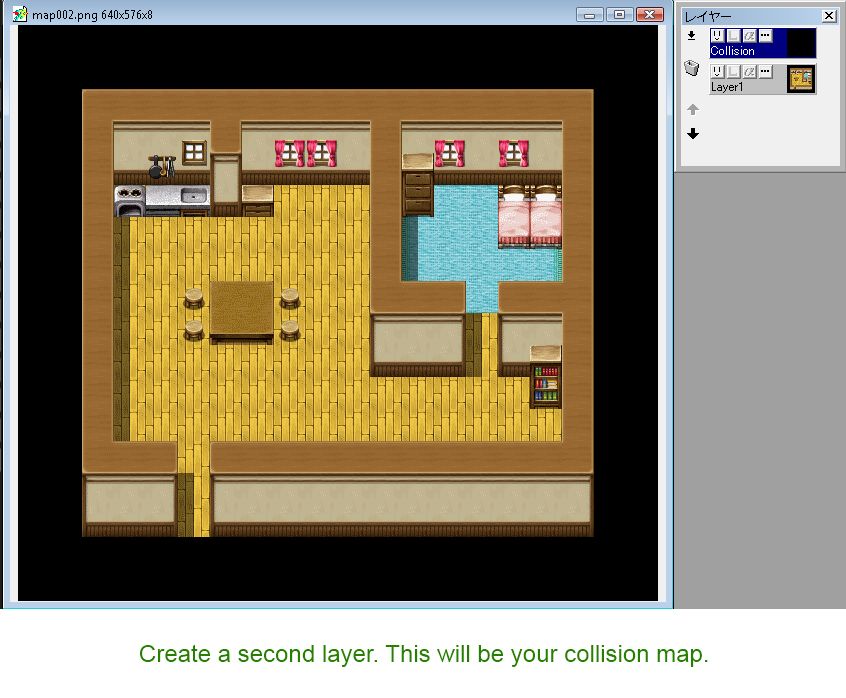
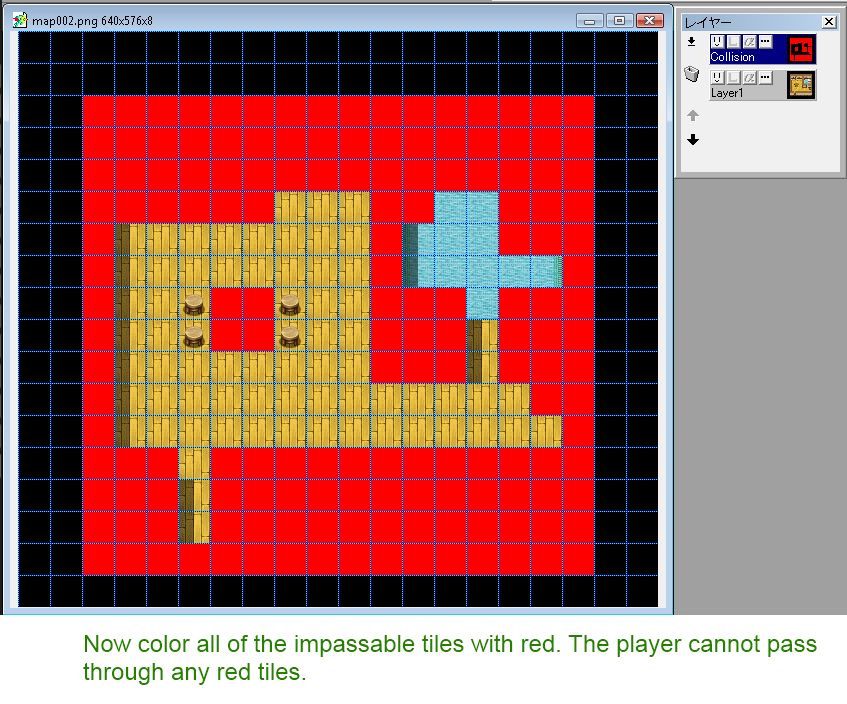
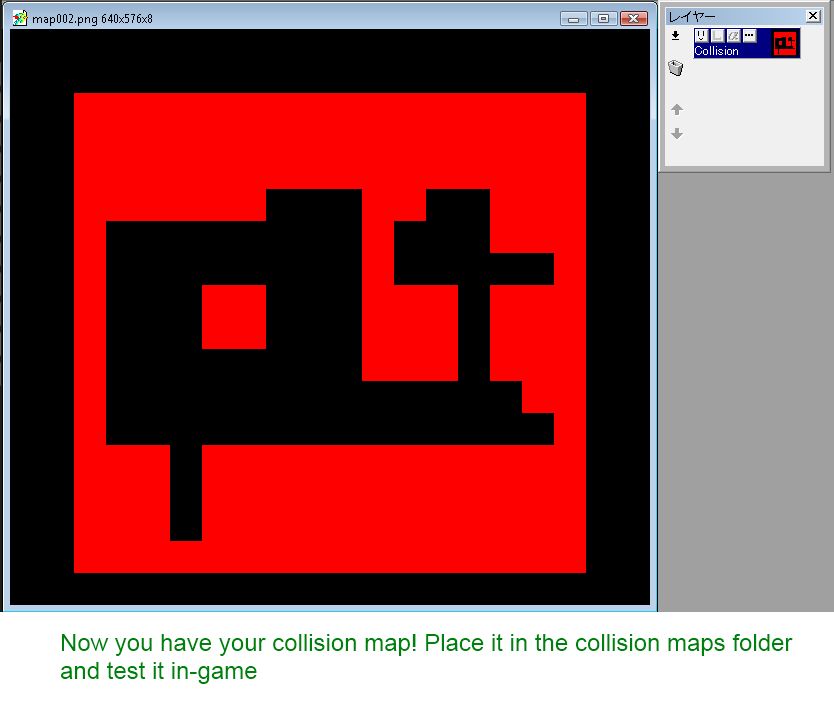
The following images describe one way you might create collision maps using Graphics Gale.
Closing
When you get used to creating collision maps for tile passage settings, you should find that it becomes much more flexible than relying on the editor’s built-in passage settings. It takes a little more work to create them, but overall it should give you more tools to work with when building your maps.


Does this script support diagonal tiles to have collision? If I wanted to use only half a tile from the bottom left corner to the top right corner if that’s a good example.
Probably not, I think it assumed 4-dir movement only.
Thanks for the Pretty Girl Card game.