Basic Overview of Blend Modes


In this article we explore a feature built into RPG Maker sprites called Blend Type. Personally, I don’t see it come up very often, and initially I didn’t have much idea how it works either. It just seemed like it did something with your colours but it wasn’t clear what it was doing. After doing some research and understanding what colour blending is, I have (almost) successfully created a tunnel vision effect using only pictures.
Understanding Blend Modes
As always, Wikipedia helps us with a general idea of what this concept is. Here’s what it says:
Blend modes (or Mixing modes) in digital image editing are used to determine how two layers are blended into each other. The default blend mode in most applications is simply to hide the lower layer with whatever is present in the top layer. However, as each pixel has a numerical representation, a large number of ways to blend two layers is possible. Note that the top layer is not necessarily called a "layer" in the application. It may be applied with a painting or editing tool.
Which doesn’t really explain much about how it works, but that’s because “blend mode” refers to the type of blending you are performing.
You have to read the other article on colour mixing to understand what mixing means in the context of digital graphics (or light in general), and to understand that you have to understand how colour works. So to avoid all that reading I will provide some summaries based on my own understanding (which may or may not be accurate since I’m overly simplifying it).
Quick Summary
Colours in Graphics
- Every pixel is represented by an RGB for the colour
- RGB stands for Red, Green, and Blue. These are the primary colours of light
- Each component has a value between 0 and 255 inclusively.
- If you tried to go below 0, it’ll just be set to 0.
- If you tried to go above 255, it’ll just be set to 255.
- Typical syntax I use is (R, G, B)
- (255, 0, 0) is red, (0, 255, 0) is green, (0, 0, 255) is blue
- Different amounts of each component will result in a different colour.
- (0, 0, 0) is black, while (255, 255, 255) is white.
Here’s a colour wheel. You can see the RGB value in the lower-left, though it is represented in hex format #RRGGBB
Transparency
- In addition to the RGB value, some image formats store an Alpha value with the pixel
- Basically, in RPG Maker, 0 is transparent, 255 is opaque, and anything in between is semi-transparent.
- This is how you can make ghosts sprites or windows look see-through.
How Blending Works
Now that you know how colour works, we can finally talk about blending.
Recall that pixels are composed of three individual colour components, and each colour is simply a unique combination of these values. Because the components are numbers, you can perform math on them. All algebraic operations follows the same rules as vector algebra: operate on each corresponding components; R with R, G with G, B with B.
So for example, if you had a black pixel (0, 0, 0), and then you add some pure red to it (255, 0, 0) you will result in a pixel that is pure red (255, 0, 0). Just accept that it works that way.
Similarly, if you had a pure red pixel (255, 0, 0) and then you subtracted white from it (255, 255, 255), it will result in a pixel that is black (0, 0, 0). Remember, trying to go below 0 will simply be rounded to 0. The Wikipedia article on colour mixing has some pretty nice images about it. If anything they are colourful.
Blend Modes in RPG Maker
(Un)fortunately, RPG maker only provides three blend modes
- Normal – upper layers will simply replace lower layers
- Additive – add colours together
- Subtraction – subtract colours
The order is important: it is always from the lowest layer up to the top layer. Basically, “255 – 0” does not equal “0 – 255”.
So for example, suppose you have your map. The tiles are rendered on viewport1, which is the lowest layer compared to viewport2 where pictures and character sprites are drawn. If you displayed a completely white picture using the Show Picture command and set the blend type to zero, this means that you are taking the pixels on the lowest layer (tiles) and subtracting the colours by white. Subtracting anything by white will result in black, so you will simply have a black screen.
Not very exciting.
On the other hand, if you subtract anything by 0, there will be no change. This means that if you subtract any colour by black, you will have the same colour.
Which is also not very exciting.
But what happens if we combine the two rules together?
The Tunnel Picture
If subtracting white results in black pixels, and subtracting black results in no change, we can craft a little picture like this:
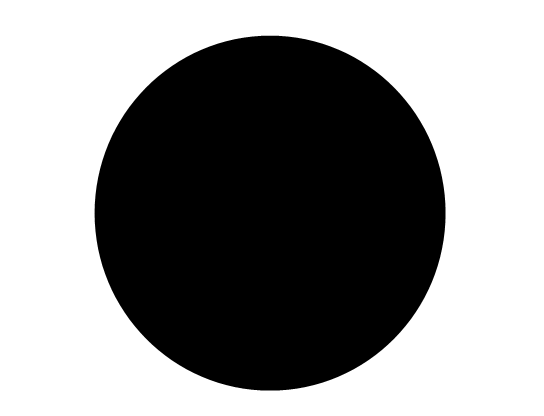
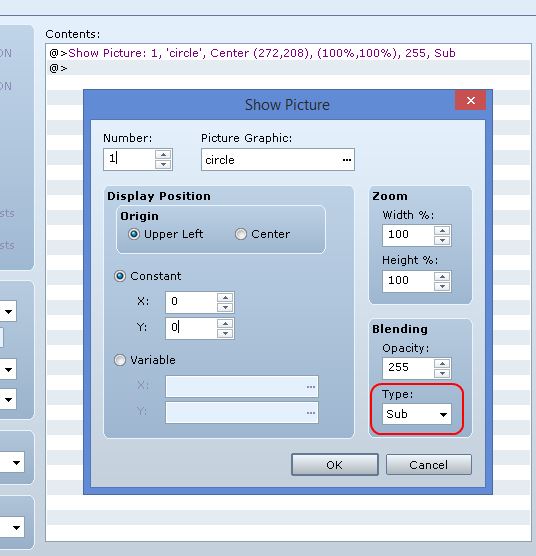
And then use a Show Picture event to display it.
Now we go into the game and see how it looks:
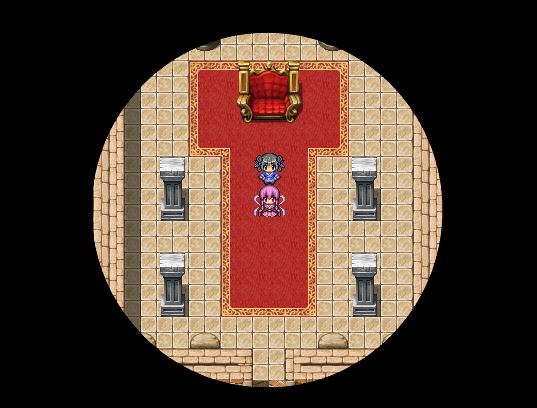
Of course we could have just created an image of a transparent circle on a black background, so at this point I’m not exactly sure what the point of using blend mode was.
At a loss for examples, I decided to remove red instead of white and made the black circle a bit smaller, resulting in an image that looks like this:
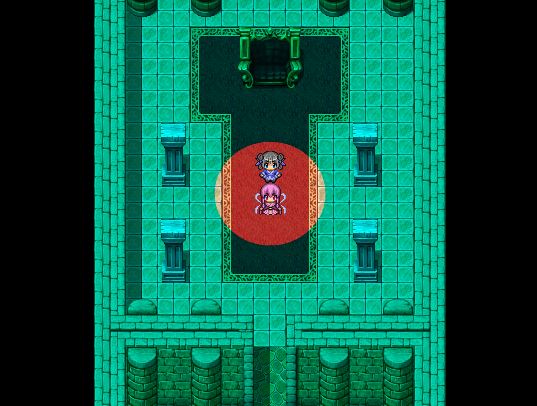
That’s not something you’d be able to do with a regular picture right? Some sort of blending would be required now!
Pictures do not Follow You
Note that due to the way pictures work, the circle doesn’t really follow you around. It’s just that the picture is attached to the screen, and the camera is centered on the player by default. Once you move to the side of the map, you’ll see that the circle is no longer centered on the player. We will explore this in a different article.
Summary
Math is the general idea behind colour blending. In RPG Maker you can replace, add, or subtract colour from each pixel, allowing you to create some fairly intricate colour effects. Combined with other picture-related functionality such as resizing or moving around, you can create various dynamic effects.
Spread the Word
If you liked the post and feel that others could benefit from it, consider tweeting it or sharing it on whichever social media channels that you use. You can also follow @HimeWorks on Twitter or like my Facebook page to get the latest updates or suggest topics that you would like to read about.


I’ve always wondered about uses for the blend mode. Great article, thanks. 🙂