Assigning Multiple Action Triggers to your Events


In this article I discuss a particular type of interaction between the player and events.
We start by looking at the basic “action” trigger and how it works. Afterwards, we go straight into how we can turn this simple idea into an extremely efficient and effective way to create events that will respond to you differently depending on how you choose to interact with it.
The Action Trigger
As an RPG Maker developer, the first thing you should become familiar with in an event is interacting with it by pressing the action button. This is by default the Z key or the Enter key.
Let’s set up a simple event that greets you:
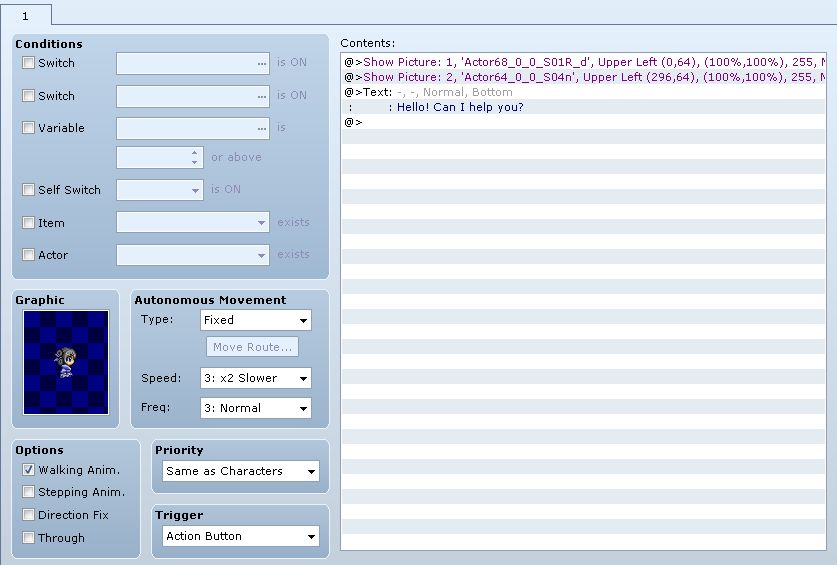
Note the trigger type we use: Action Trigger. This specifies how the event will be triggered.
Without any custom scripts, we use some pictures to make our dialogue seem somewhat more attractive to look at.
Going into the game, we can go up to our event and press the action button, which will set off the action trigger.
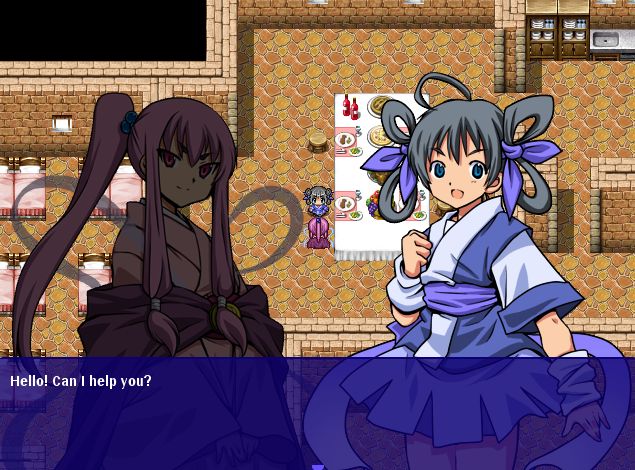
And that’s a basic overview of how the action trigger works. That’s basically all there is to it: you press a button, and the event is triggered.
An Alternate Action Trigger
Suppose you have a card mini-game, and you would like to be able to play cards with different NPC’s that you see in the game. Perhaps the card game has its own set of quests and you have to defeat certain characters in order to complete the quests.
Or suppose you have a pickpocket system where you can press a certain button when you’re facing NPC’s, and instead of talking to them, you would instead trigger a steal action that would determine whether you successfully steal from the NPC or not.
There are many possible use cases, and it would be very convenient if we can implement the event sequences while providing an easy way to maintain them.
Review of Button Input
RPG Maker provides two modes of input: keyboard, and gamepad. I will assume you are using a keyboard.
There is a difference between the keys on your keyboard, and the buttons that each key corresponds to in the game. By default, the action button is assigned to the in-game “C” button. However, that doesn’t mean you will trigger the action button by pressing the C key on your keyboard.
When you start the game, you can press F1 to bring up the game options. From there, you can look at and modify the key bindings for the game.
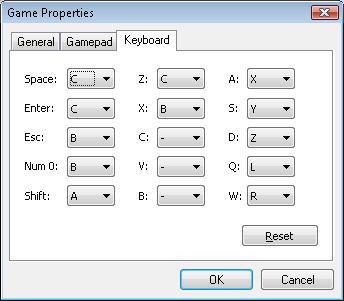
The entries on the left are the keys on your keyboard. The entries to their right are the in-game buttons that they correspond to. So we can see that by default, the “C” button is assigned to the “Enter” key, the “Space” key, and the “Z” key. This means that you can bind multiple keys to the same buttons. You can verify this by attempting to trigger the event with each key, and you should be able to do so successfully.
Note that these are the properties for your own instance of the RPG Maker game player. It does not affect anyone else when you distribute your game. As such, this is mainly just something that I use as a reference.
If you wish to change key bindings that will affect other players, you will need to use a script for it. This one is an example, but as it is not the focus on this tutorial I won’t go into details.
Partition Your Event Page
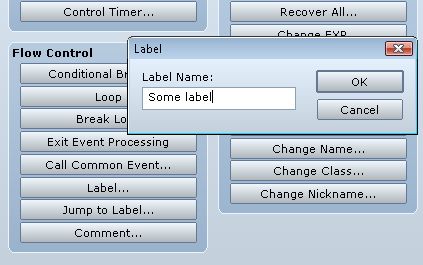
Looking at the list of commands I have to work with, I see that I have something called a “Jump to Label” which allows me to jump to another label on the page. Seems like something that we could use.
Here’s me with some thoughts on how I could potentially do this
What if we could make it so that we divide up our list of commands into different sections?
We can have one section that would be executed if we trigger the event in one way?
We can have another section that would be executed if we trigger the event in another way?
We could even have it so that we have countless sections for every possible way we could interact with the event?
This seems like a pretty good idea (and not only because I’m critiquing my own idea).
We would just create our events as usual, and then just break it up for each type of trigger we want to have. One section would be the normal interaction, and another section could be our card-game challenging button, or our pickpocket button. Here’s what it looks like:
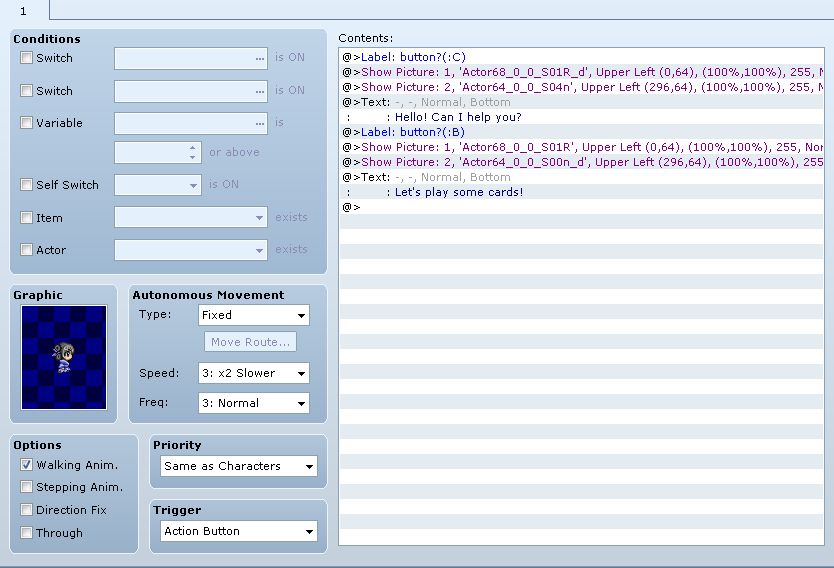
Same event, one page, nothing new. Just two added two more labels. Does it work? Evidently, no, because labels by themselves don’t do anything.
Jumping to Labels?
The labels alone don’t do anything. How about we explicitly jump to each label? We can simply make it so that if we press the C button, it’ll jump to the section called button?(:C) and if we press the B button, it’ll jump to the section called button?(:B).
That sounds like a good idea. In fact, that seems like a pretty intuitive idea given the fact that we’ve already partitioned our page into two separate sections labeled by a unique name. Depending on which button you trigger the event with, it’ll execute the appropriate section!
But now the problem is…how do we trigger an event with the B button? If you try it in your game, it simply brings up the party menu. There doesn’t seem to be a way to actually trigger the event.
Presenting the Idea as a Script
After looking around, it becomes obvious that there isn’t a way to do this only with events. So we turn to some scripts. The script I will use is called Event Trigger Labels, which is based on the idea I said above.
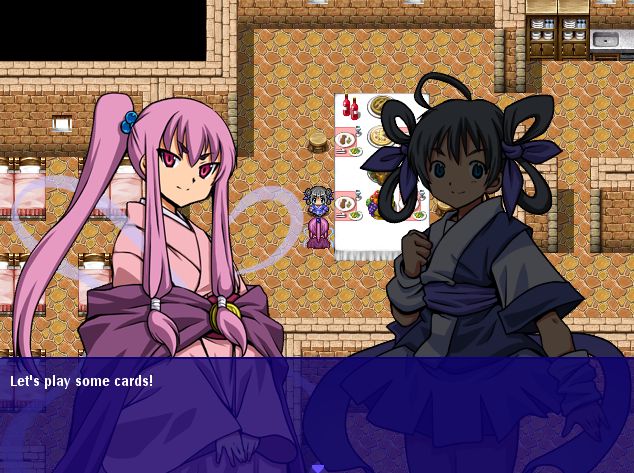
Insert the script into your project, and then try to activate the event with the B button (by default, this is the “X” key on your keyboard). And, as we have intended it to behave, it will execute the section of the event labeled button?(:B)
You can verify that both sections will execute properly depending on which key you press by press the C button and the B button to see both in action.
Moving Forward
You have learned how you can assign multiple action triggers to a single event. In my example, I showed how to assign two buttons to an event and defined how the event should respond depending on which button you use to trigger it.
Looking for the script? Get it here.
There are many more things that we can do with our trigger labels. In the next tutorial, you will learn how to use key-items to trigger events.
Spread the Word
If you liked the post and feel that others could benefit from it, consider tweeting it or sharing it on whichever social media channels that you use. You can also follow @HimeWorks on Twitter or like my Facebook page to get the latest updates or suggest topics that you would like to read about.


this script has problems.
I use the labels as it says here, but the sequence of instructions of the event is executed after many times pressed, and you must press it quickly or else it doesn’t work.